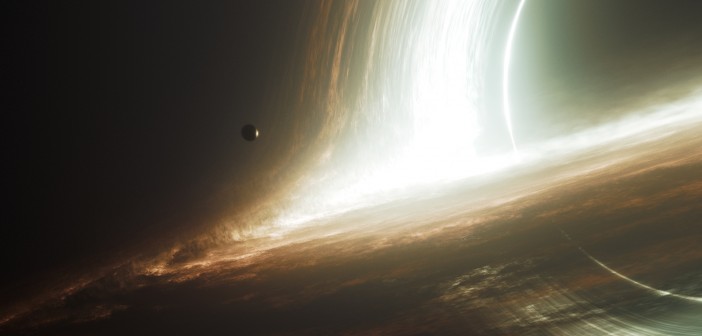
In the Behind the Scenes series, I'm inviting artists to talk about the creation of one of their works. Today, Nika Maisuradze explains how he created his Gargantua black hole scene - a reproduction from Interstellar.
Hi everyone, my name is Nika Maisuradze (aka BlackRainbow), i'm generalist 3d artist from Georgia. Here is little insight on howmade my recent "Interstellar" inspired artwork.
I always felt passion for sci-fi and for hard science. So seeing "Interstellar" was very inspiring for me from that point. I was amazed of seeing how gravity distorts the accretion disk of the black hole. It was something new, it was something no other sci-fi movie has shown before. And I thought, I should try it.
Gravitational Lensing
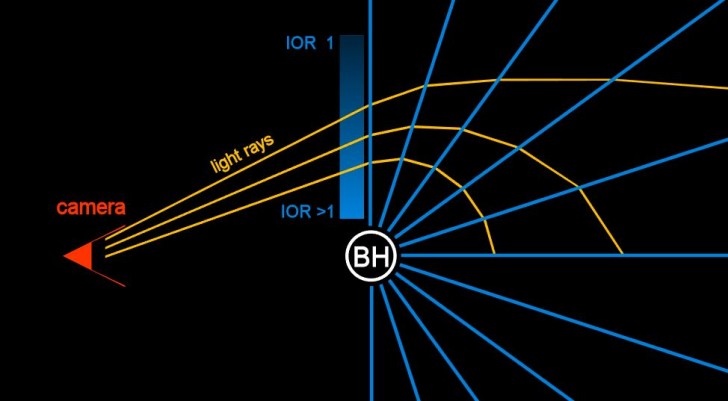
As coding a new integrator, or a renderer was not an option for me, I had to figure out how to mimic it relatively closely with existing resources. So, one and only idea I had is to mimic it with actual lensing, with refraction:
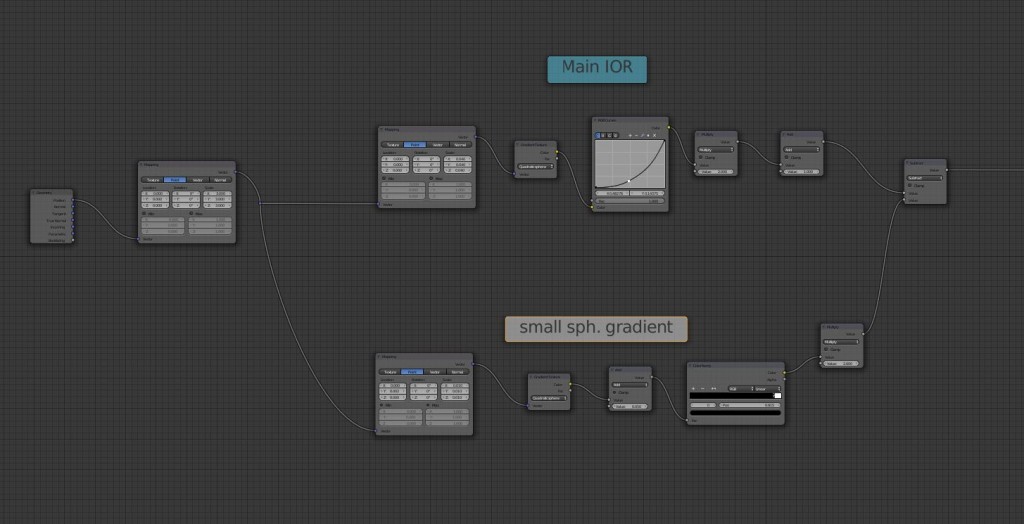
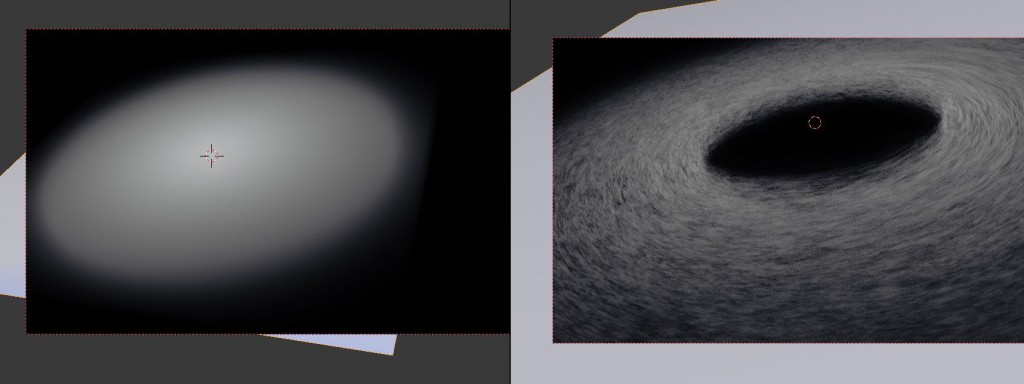
The refraction shader's IOR input is mapped with sphere gradient to which the value of 1 is added so at the darkest point of gradient the shader would still have 1 as an IOR, so it would not distort image where it is not needed.
The distortion geometry is always facing the camera so the distortion will be the same from all angles (which is true only for non rotating, black holes, rotating black hole's gravitational distortion has a well defined structure in the space, which also is referred as frame dragging). I found out that surfaces should be quite dense and all geometry should have subsurf modifier on it with 3 or 4 subdivisions in order to avoid artifacts.
For the inner ring to appear the small hard spherical gradient is subtracted from the main one. That creates a ring shape on the edges of that small gradient which is being subtracted.
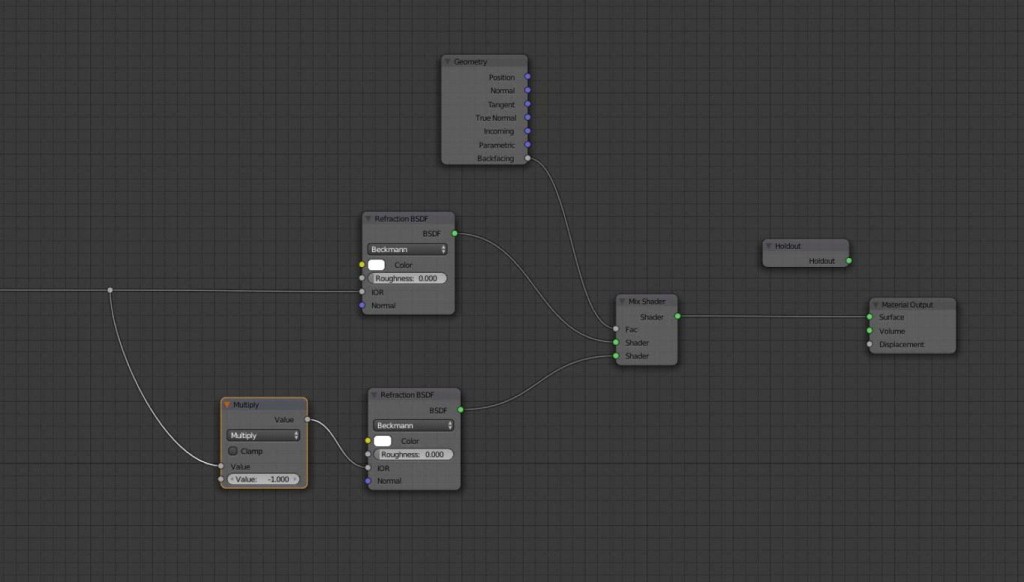
There was still a little issue. Last half of refractive surfaces light ray would hit had inverted normal, so because of that they would need negative IOR in order to render properly. This was done simply by passing ior to math node which would multiply it by -1 and pass the result to separate refraction shaders ior input. And after, these two shaders were mixed together with a backfacing as a factor.
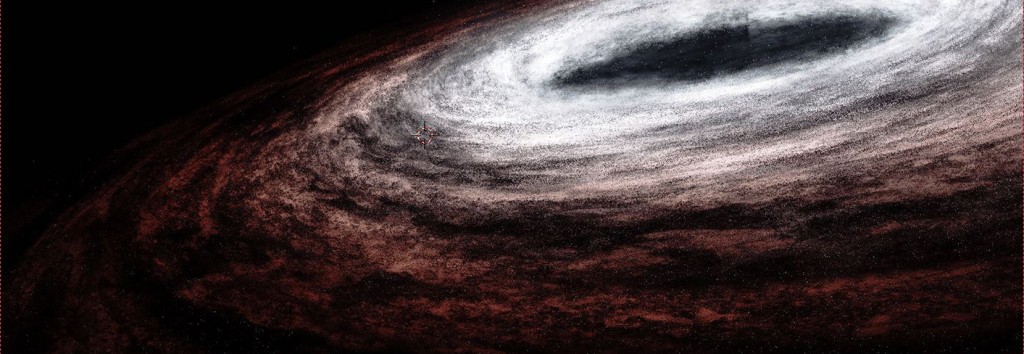
This is the distortion result with a simple geometry. Red tone shows underside of the disk.
Accretion disk
I had 2 options: fluid simulation (smoke), and procedural approach. My first tests were with smoke simulation. But later I found out that Cycles does not support smoke on GPU. That was very unfortunate because on CPU render times were high enough (4-6 hours) even for smaller than 720p renders (main slowing factor was grav. distortion setup).
Still I tried to optimize scene but after trying to render some one of the tests in fullHD and finding out it would take 3 days, I thought it's right time to try second option - procedural approach. If in a future, smoke rendering on GPU will be available, I do think it would give much better results than the procedural approach.
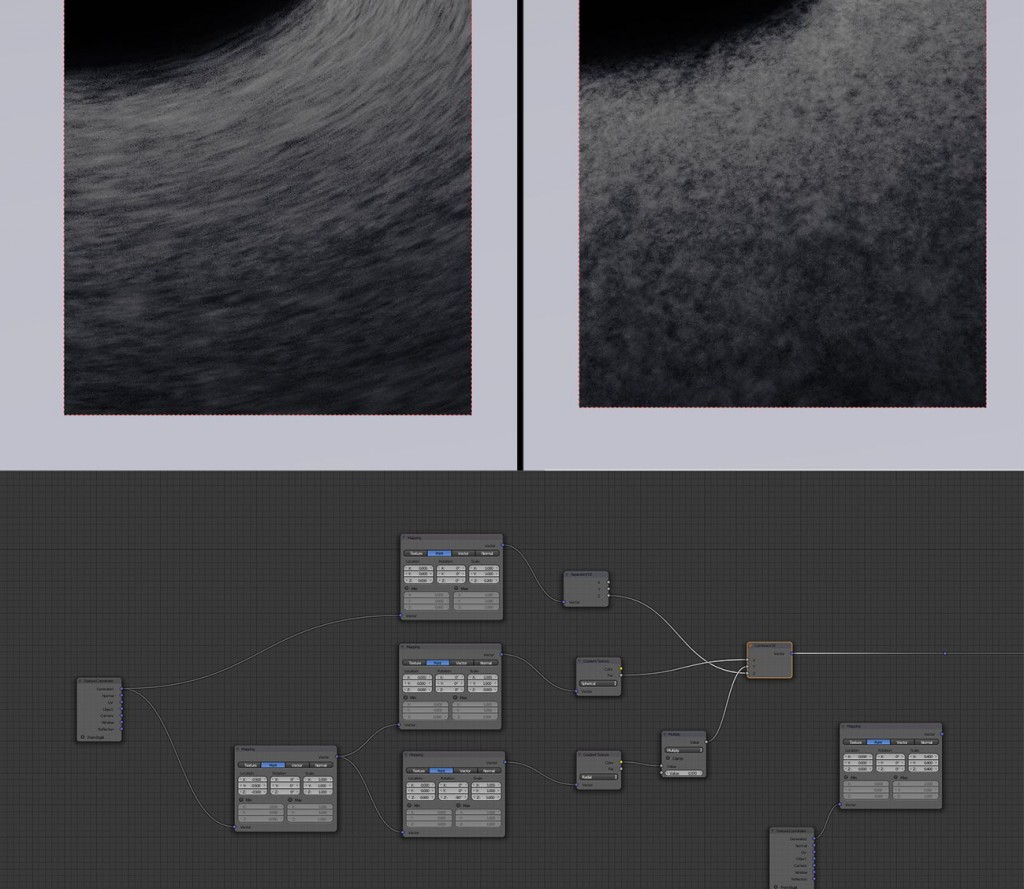
I started with basic sphere gradient (i knew I would have to use lot of gradients) after getting right scale, I multiplied it with a mix of few noise textures. Result I multiplied with another spherical gradient to make a hole in the middle of the disk. Later I found out it is a minimal stable orbit for a black hole. Before, I thought it was just an artistic trick to make it appear more visually plausible.
For every noise texture I used single vector coordinate. So that any change would apply to all noise textures
I used radial gradients for vector coordinates to give a swirling look to noise textures.
Accretion disk overall has 3 volume layers each with different transparency and texture, all 3 layers at some point are getting summed together and passed to volume scatter shader and volume absorption shader. Then, obviously, mix shader and material output.
One of the layers is a "main light source". It is a bit soft and bright. Another layer is more like dark clouds which partially obscures the first "main light source" layer. And last, third layer is a gaseous soft layer on a top of other 2 layers. It adds softness to disk overall.
At one point I tried to light the disk from one point light source from the center, results were interesting, but it more looked like a clouds in earth's atmosphere rather than something stellar. So I thought that accretion disk itself should emit light. For that, I multiplied each volume layer with separate large scale noise (actually a mix of noises) indicating a region of disk that will emit light, and passed the result to emission shader which is then added to final mix shader with volume scatter and volume absorption.
For emission color I used blackbody node with gradient in the temperature input, so the closer part will emit more blue light and outer - more red. It is an analogy to "real" black hole's accretion disk (actually still theoretical as no black holes were directly observed to the date).
Later at the compositing stage I still decided to tint the result to yellow - red tones, so the blue colors are barely visible, if at all. I guess the movie had influenced little bit too much.
Compositing
At some point I was rendering the result as a one single layer and then masking out some parts to get a glow source mask for inner bright ring. Bat at latest iterations I decided to render it as a two separate layers. Foreground layer, non distorted front part of the disk. And the background, distorted part of the disk. So now I had full control of the inner ring. I could add all the glows and stuff and the add the foreground
I was using Blender for compositing of this project. But at some point when composite node tree had become too complex, I decided to use of Fusion (free edition). I used two rendered layers and the planet layer, which was the separate simple scene.
Basic workflow was to add glows with different sizes to each layer and then merge them together. For inner ring I used noise to add a specific glow effect.
I had a few versions for color grading setup, but at the end I decided to keep the red-yellow tone, which is closer to the one that was in the movie. Yeah, I guess movie had too much influence on me :)
I hope this article was informative enough. If you have any questions you can ask me here at the comments section.







5 Comments
Dear sir,
I'm Sandu from New Zealand. I really need to make a project similar to the one you have done here for my one of my uni papers. I have been reading about this and on many forums and I'm very very new to blender. Please, Is it possible for you for to provide the project file of this scene? so I can see how everything is done and make on own version of it? I know this is a long shot but is it possible for you to make a video tutorial for this? or send me a timestamps video and I could slow it down and watch it. I would support you anyway I can in the future if you help me. Thank you so much and I'm waiting for your reply.
Very interesting and amazing procedure. Good work.
I am somewhat of a beginner in blender and have trouble understanding how you procedurally created the accretion disc. Is there a resource I can use as a guide to recreate a similar look?
Thanks!
Blender is a brilliant piece of software, I just wish I had the brains to work out how to do stuff like this. DIMA ANT, i hope you discovered a guide to help you with this.
Can you do it in Eevee?