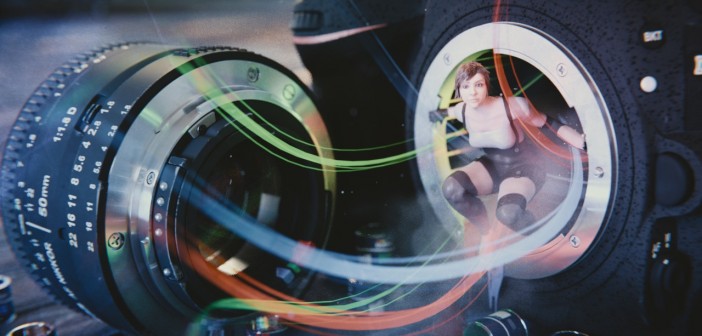
In the Behind the Scenes series, I'm inviting artists to talk about the creation of one of their works. For today's episode I invited Mark Titchener to let us look at how he created 'Inside Your Camera'
Hello! My name is Mark (aka swmo on Blender Artists). I'm a software developer from the UK. I've been using Blender for 2½ years now since I was introduced to it by a friend. Although I did an art A-Level 20 years ago at school I've hardly done anything since and it was great to rediscover a love for art again. I find it a relaxing hobby to do in the evenings instead of watching TV and I've also recently started sketching in 2D with Krita. I'm not an expert by any means, but hopefully I can provide a few tips for beginners.
Inspiration
This particular image came about in an unusual way because it started with just the camera model. I was looking for a model of an SLR on blendswap to use as a minor element of another image and couldn't find a good one. I thought "that should be easy to make and put on blendswap".
Wrong. There are so many buttons and different bits, and no part of the body is flat, it's all curved at weird angles. I've now got a new appreciation of what an amazing piece of design a modern DSLR camera is!
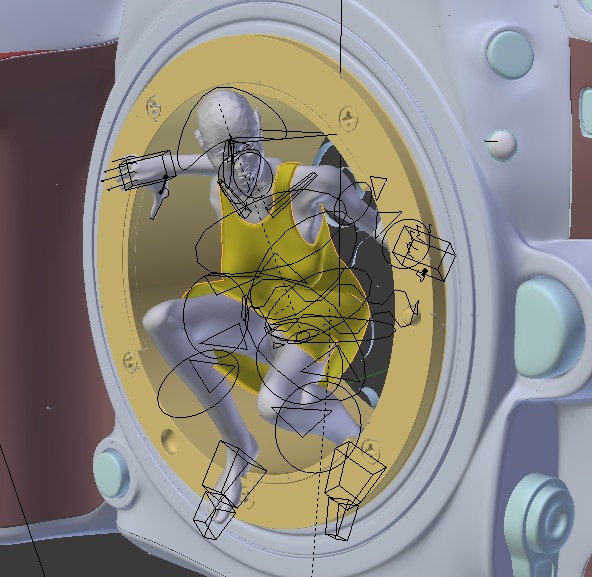
By the time I finished the camera body I had spent so long that I had the idea to show it in a more artistic image. The camera imp is inspired by the concept from the Discworld novels by Terry Pratchett. I thought it would be fun to have the same idea but with a photo-realistic modern camera.
Camera Model
This was surprisingly difficult to model. I got reference images of both sides, top, back and front from Google Images and set them up as background images, However, it was quite a struggle to work out all the curves of the body and also get all the holes for the buttons without affecting the curve of the body.
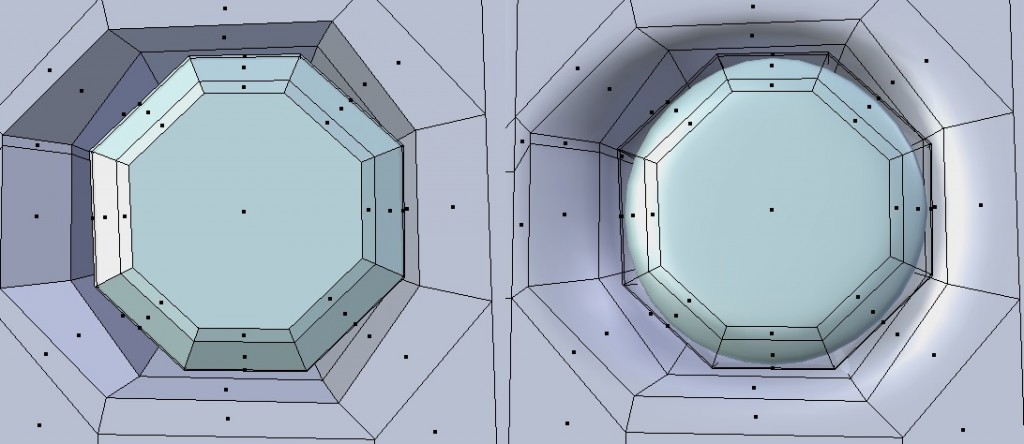
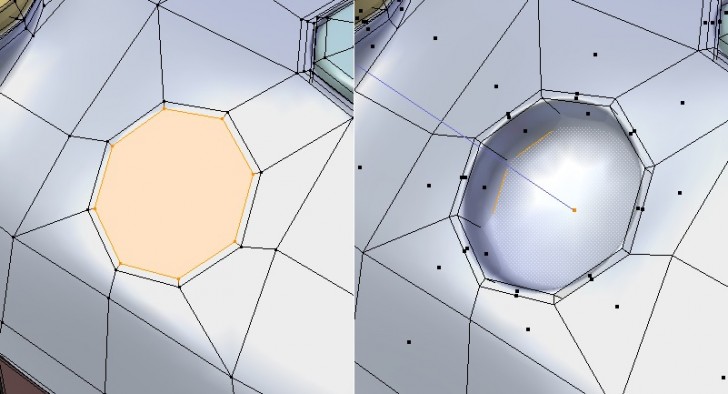
So, here are some tips I picked up which might help beginners like me model a complicated hard-surface object. I wanted to keep it as low-poly as possible for the level of detail. For example, the face of a circular button only needs 8 edges (an octagon). The subdivision surface modifier turns this into a circle with only 1 or 2 levels. The fewer vertices you have, the easier it is to arrange them in the curve you want.
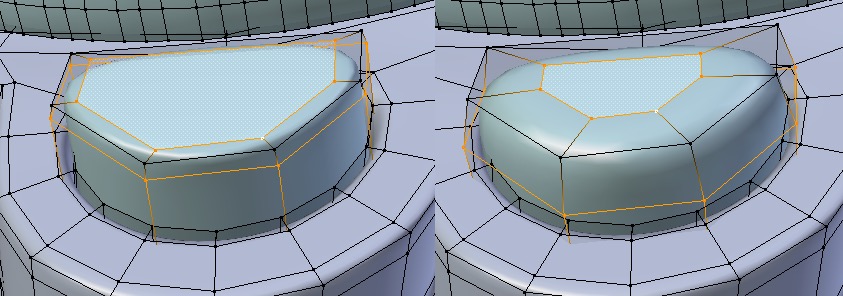
Adding edge loops makes the edges more or less sharp - the closer to the corner you add the edge loop the sharper it looks once the subdivision modifier is turned on. Select the edge loop and press G twice to enter edge slide mode to adjust it.
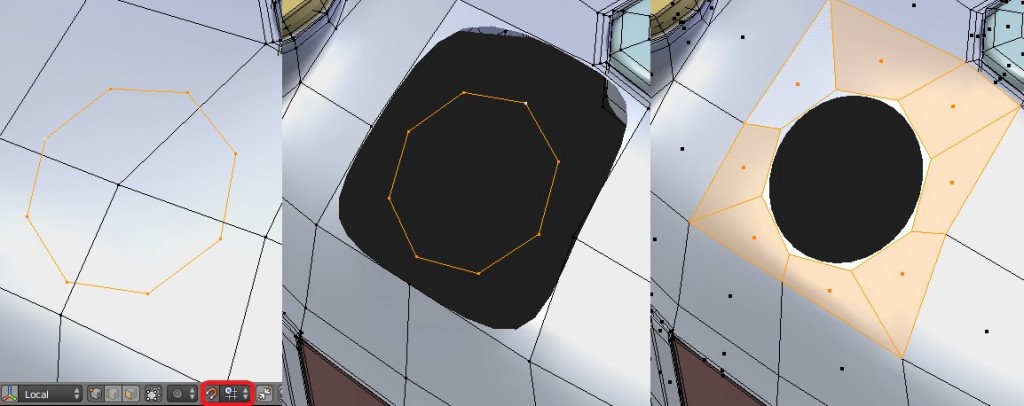
There may be better ways, but the most controlled way I found to put a circular hole in an curved face, was to add a circle of vertices, rotate it to be in the same plane as the face and snap the vertices to the faces. Then delete the faces around it and add them back in joining to the circle (select 4 vertices and press F). Choosing 8 vertices for the circle really helps here.
Next select the inner edge and make a face (F). Then inset (I) to add another inner circle - you need this extra circle to create a sharper edge. Finally extrude (E) to create the hole.
Materials
I didn't want to have to UV unwrap it all, so the material textures are all box mapped.
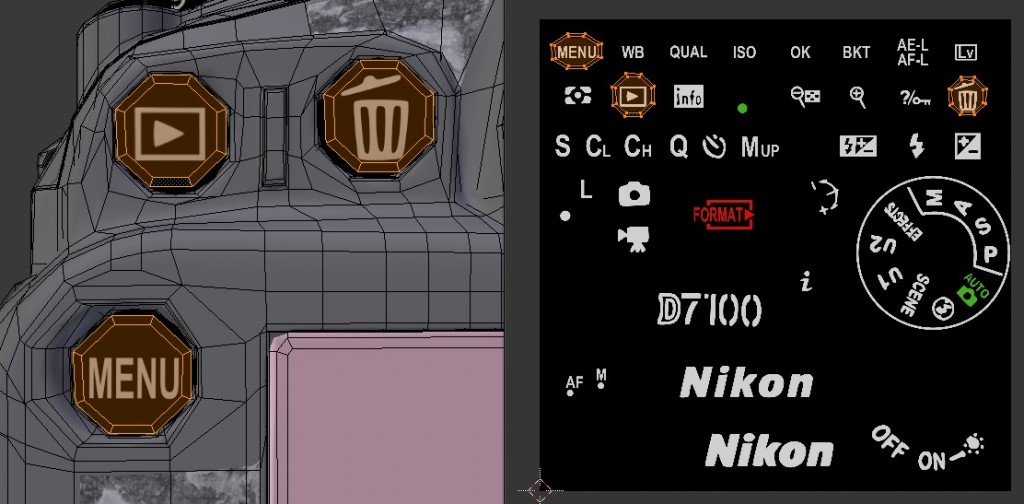
For the decals. I made a single image in Inkscape with all the letters and symbols. Then I unwrapped just the individual faces, or groups of faces needed for each decal using a projection unwrap and placed them over the correct part of the decal image.
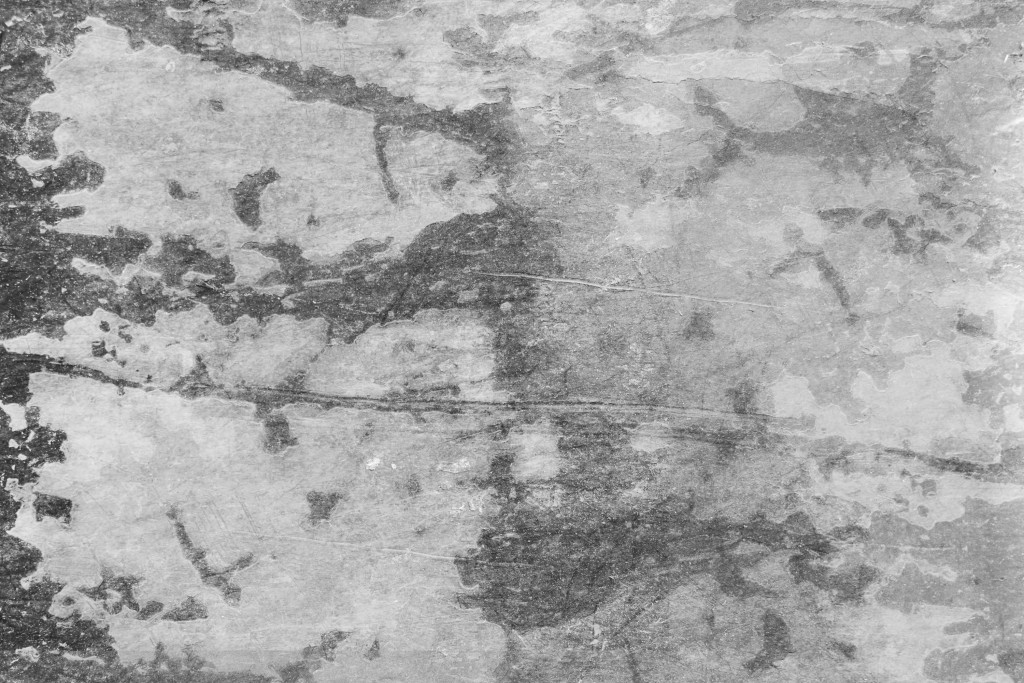
Because I wanted to put it on Blendswap I made all the textures myself. For example, this grunge one is used for varying the roughness of the glossy shaders. I made it from a photograph of some rusted metal I took and edited it in GIMP:
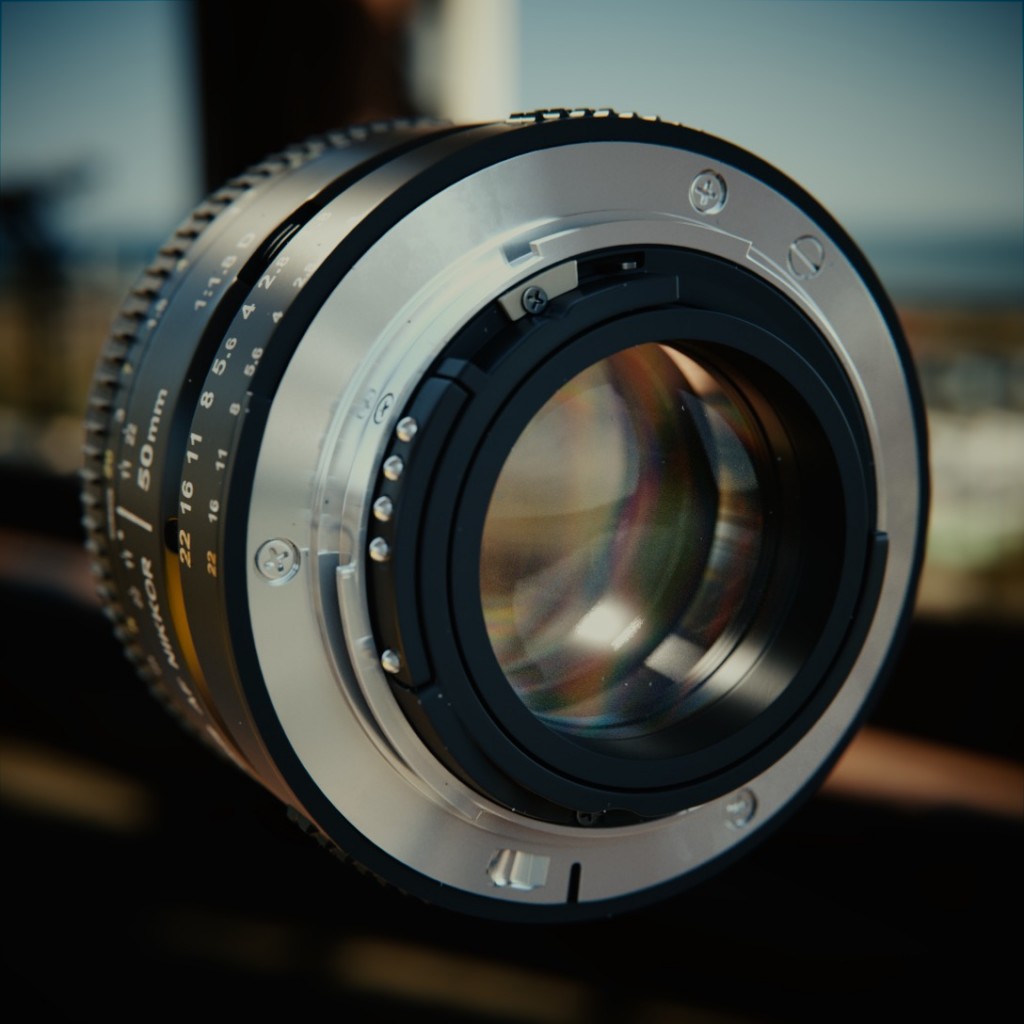
The lens material uses a dispersion node group which refracts red, green and blue by different amounts, as explained here. This works really nicely in a lens:
You can download the final camera model on Blendswap. It is CC0 so no need to attribute it to me but I'd love to find out if you used it somewhere by a comment on blendswap :)
Camera Imp
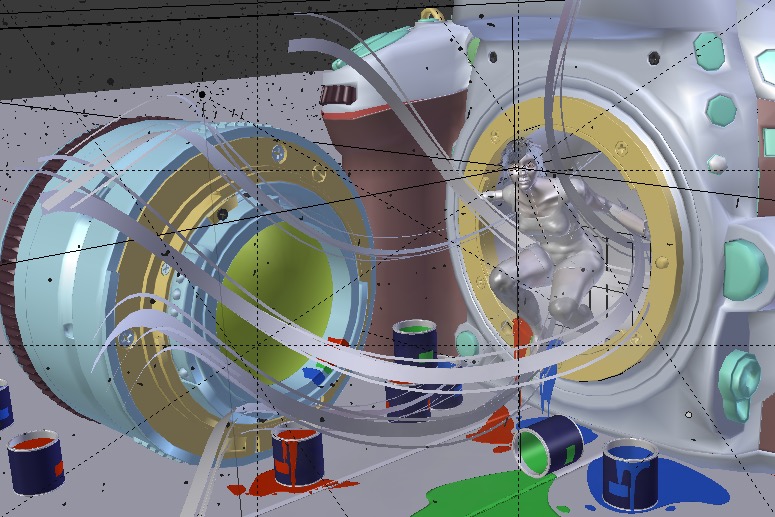
For the camera imp I wanted a cute/sexy human-like girl with a pixie haircut. The face was sculpted from a cube using Blender's awesome dynamic topology mode, and then re-topolgized.
For the body I started with a posed MakeHuman model to quickly experiment with poses.
The MakeHuman mesh doesn't work at all well with the arms and legs this bent, but it makes a good basemesh for sculpting. I applied the rig and sculpted on top with dynamic topology.
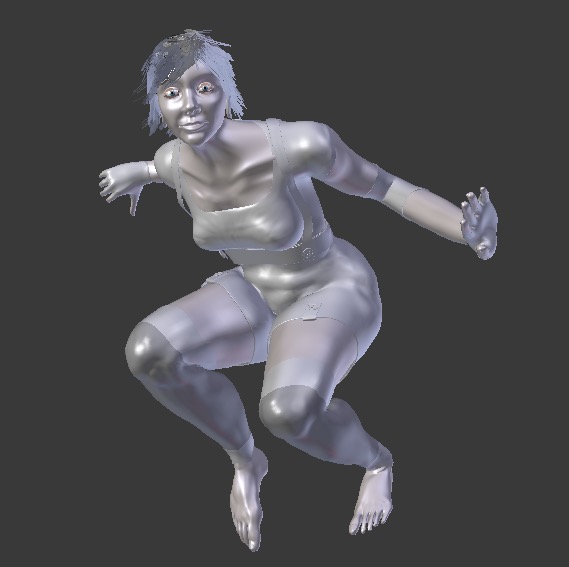
Once happy with the body, I re-topologized by snapping vertices to the sculpted mesh. Then added a multires modifier and shrinkwrap modifier. Apply the shrinkwrap and the fine detail from the original sculpt is baked into the multires. Any final touching up can be done with sculpting on multires. Here she is with the head attached and clothes and hair:
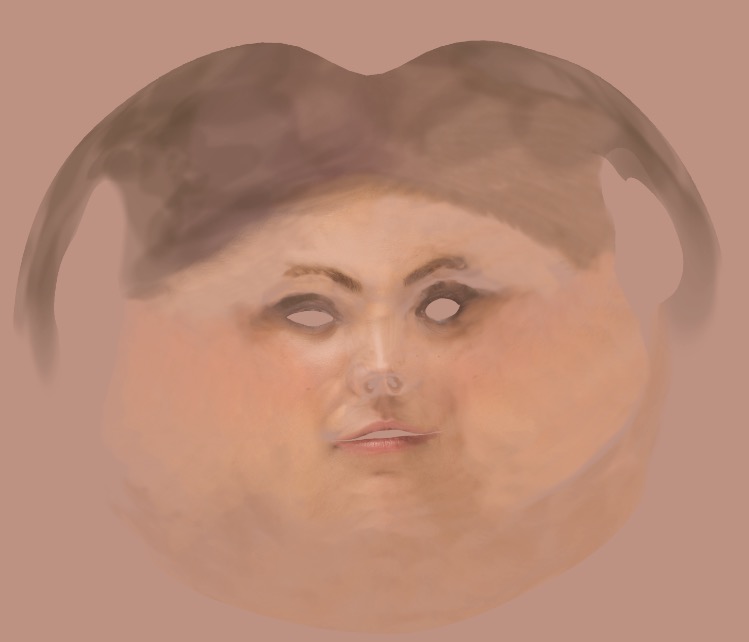
Next I UV unwrapped the head and body and texture painted in Blender onto the mesh. The new texture paint tools are really good for this. For the face texture I also used a clone brush from a high-res image of a face. Not too much detail needed though as the imp is small in the final image.
Colour Swishes
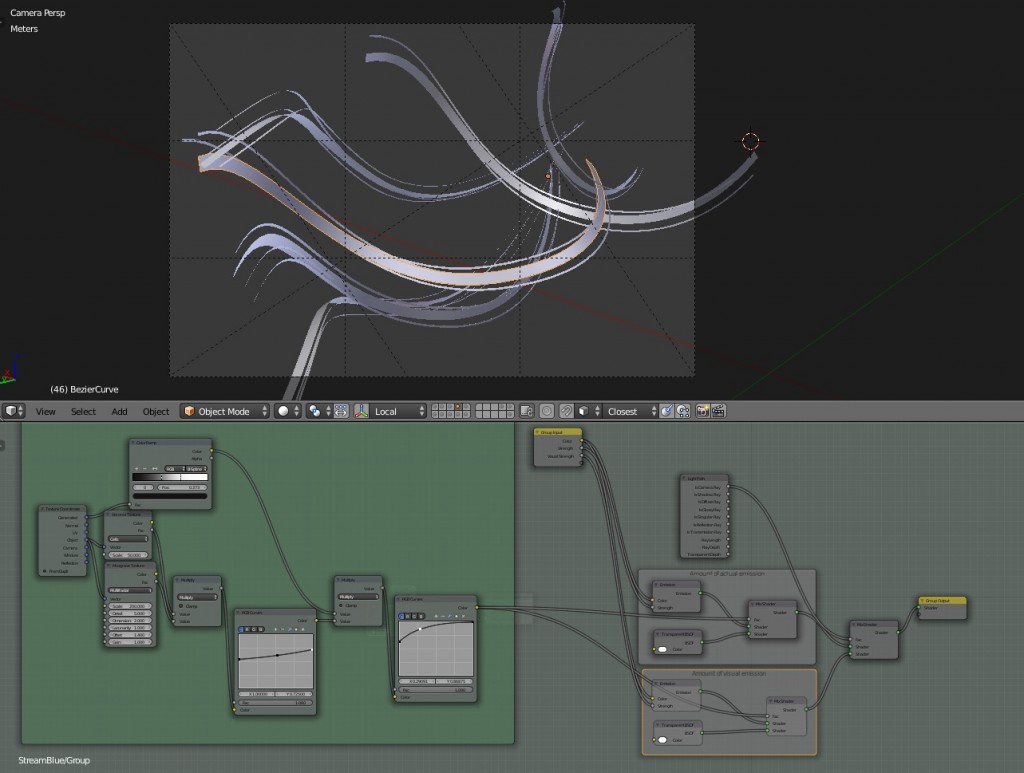
The colour swishes are geometry (from curves) - some thick and some thin. They are supposed to help the composition by drawing your eye to the imp, but also to look like the colour is exploding out of the camera. The geometry and shader look like this:
There is some variation in transparency and they fade out at the ends - that is all the stuff on the left. Then it's just two emission shaders - one weak one for camera rays so the colour doesn't wash out to white in the image, and one strong one for all the other rays so that it still illuminates the rest of the scene and casts coloured light onto the rest of the objects.
Composition
My thoughts with the composition were as follows: The intended focal point is the imp's face. This is the point the camera is focused on for depth of field, and also placed on the point of one third down and one third from the left. The lens gives a balance of weight on the other side of the image. The swishes and floorboards try to lead the eye to the imp. The circle of metal around her is also the highest contrast.
Final touches
So with all the main modelling done and the composition finalized, I added the extra bits that start to make it look less like a straight 3D render and make it more interesting.
- HDR environment lighting, sun lamp and spot light from behind the imp.
- Dust particles in the air (group particle system of roughly modelled dust objects).
- Depth of field. Making sure some bright points in the HDR make interesting Bokeh (I like hexagons).
- Choose a film curve "Look" in the Scene panel.
- Paint splatters - I could have added better/more of these, like on the imp's clothes.
- Smoke simulation. Faint smoke blown out of the camera with a force field.
- Settings to reduce noise: Clamp indirect = 3, Filter glossy = 0.5
Compositing
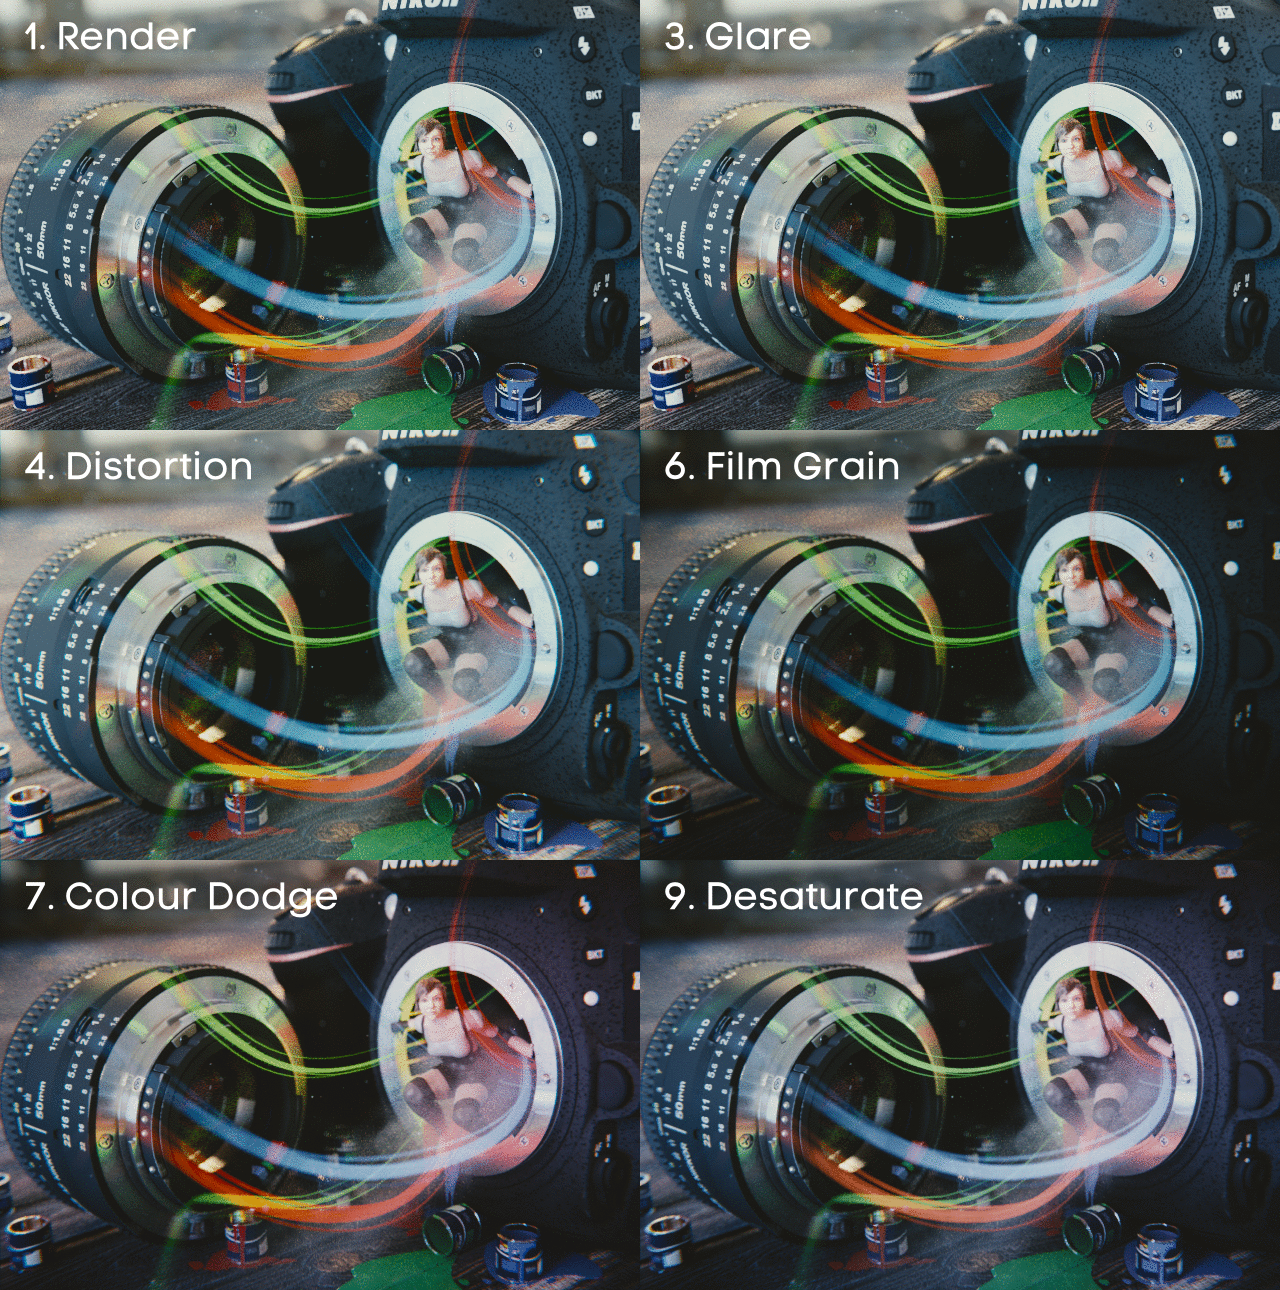
This is the fun part where your finally get to see how well the image works and the bit I always look forward to. I always have a similar set of steps. The look I wanted here is sort of a washed out blue, with the brighter colour stripes as contrast.
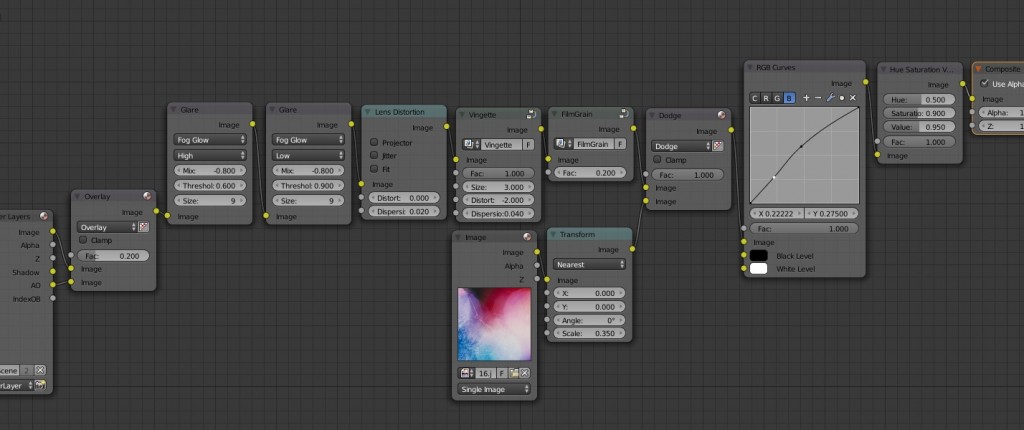
The steps from left to right are:
- Overlay AO pass
- Glare
- Lens Distortion
- Vingette
- Film Grain - You hardly notice this, but it really helps to bind the different parts together by providing consistent noise in the 2D plane (rather than cycles noise which varies within the scene). This is like you get on a real camera and is most noticeable if you take pictures with high ISO.
- Colour/grunge overlay (Dodge mode in this case - Burn or Soft Light can also look good). Again something subtle that runs only in the 2D plane makes for an image that is more like a painting or photo than a 3D render.
- RGB curves to give it a bluer look.
- Desaturation
With subdivision 2 on the camera and lens the whole scene is 1.1 million vertices which is not actually that heavy. I rendered the final image overnight on a 4 core AMD CPU, I think it was 6 hours or so with 1100 samples and 1280x860. I could render out a passable test image with 500 samples and 50% resolution in 1.5 hours.
Thank you so much to Bart for inviting me to write a Behind the Scenes post for BlenderNation. I love seeing inside other peoples images like this so I hope this has been interesting or useful.
Thanks Mark!


