About
My name is Toivo Huhtaniska, and I’m a 3D artist from Helsinki, Finland. I have been using Blender for just over a year, but I have a background in video production, graphic design and VFX. For a long time I was afraid of jumping into 3D as it was seemed very daunting and technical, but after forcing myself to learn it, it quickly became my greatest passion. I am currently studying 3D animation & visualization full-time.
Inspiration for “Heart of the Industry”
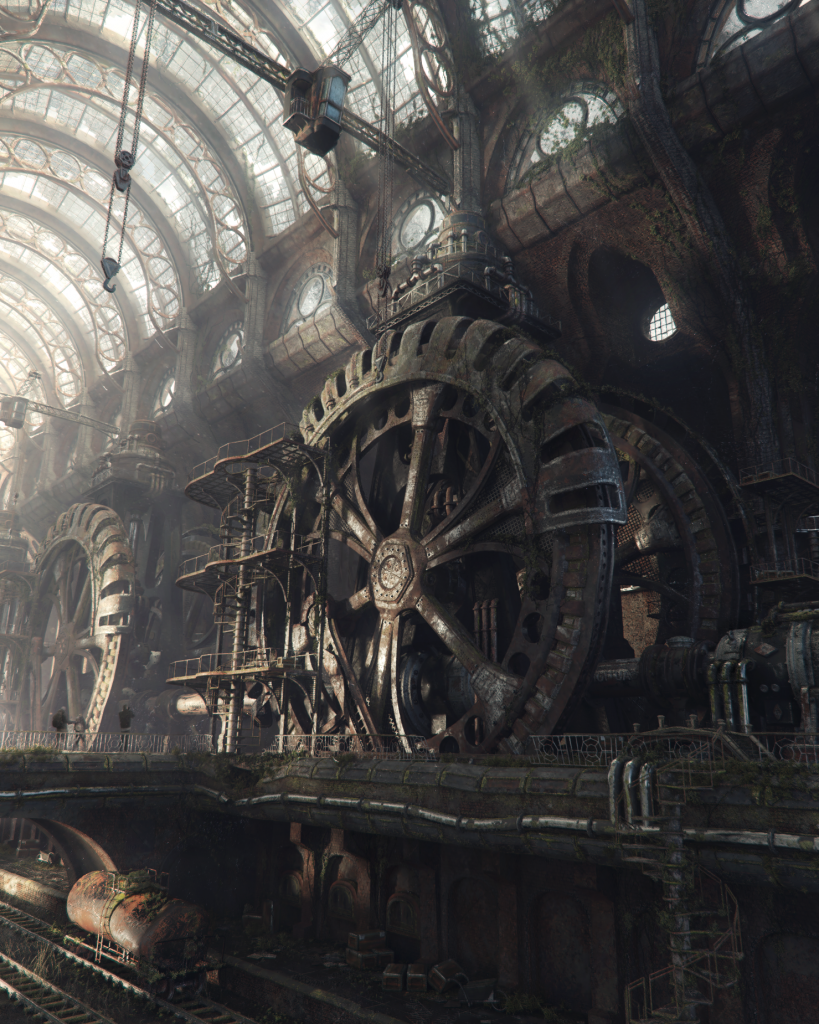
I love creating big environments with heaps of detail to keep me busy. This particular scene was created over the course of 2 months while working on smaller projects – I prefer to work on multiple things at once to keep things fresh. The idea for “Heart of the Industry” came while looking at pictures of old greenhouses for reference on another project. I find Victorian-era architecture and old machinery intriguing and wanted to bash these two things together to create an extravaganza of steampunk aesthetics!
I began to sketch a large room with huge steam-powered wheels to generate power to the city. I went for a rather unconventional design with rounded edges and decorative detail; perhaps the structure wasn’t built for this purpose but it was converted to an industrial facility to keep up with the growing demand for power. Creating small backstories gives the scene more character.
Workflow
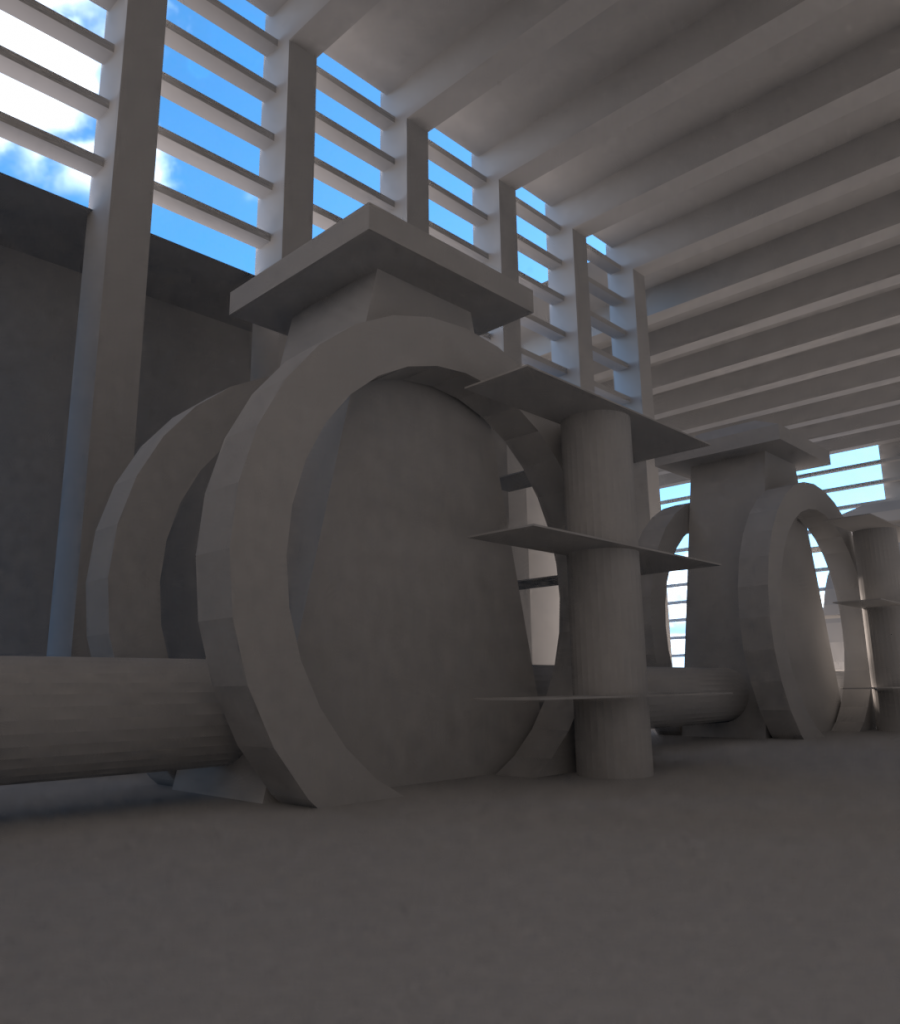
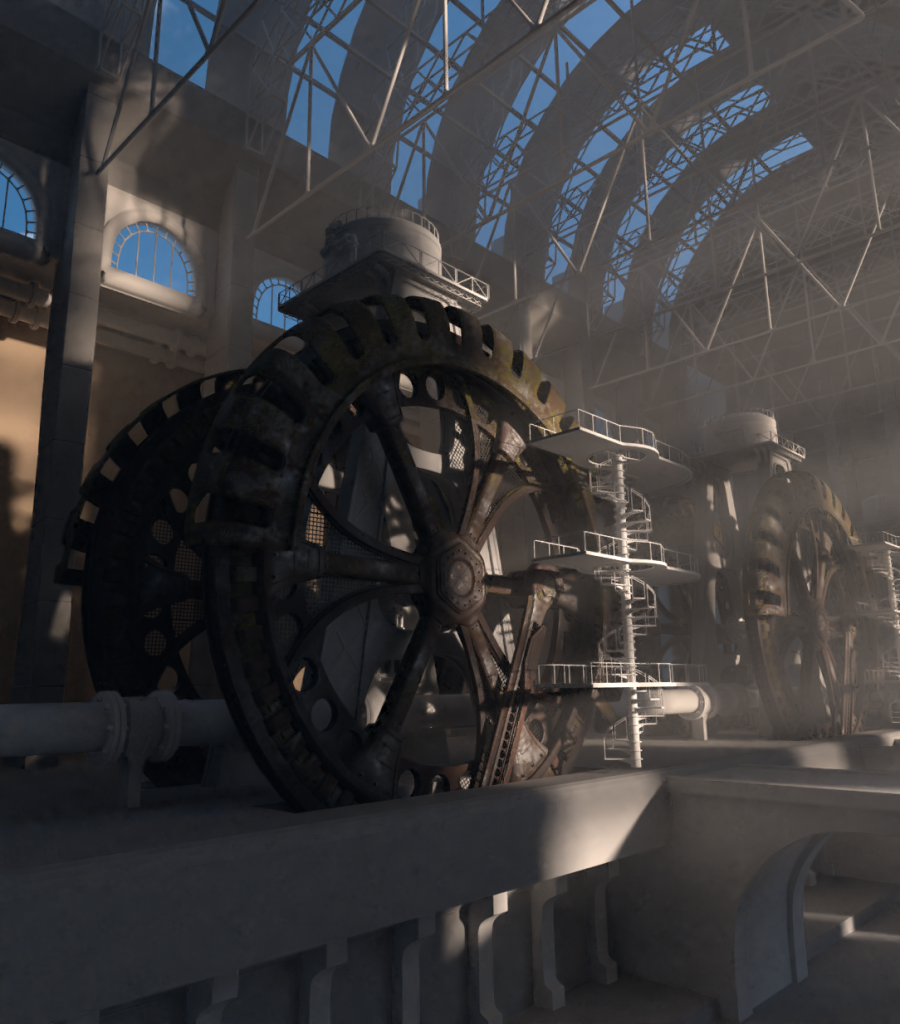
Initial blocking out of the scene with simple shapes to feel out the space and find interesting camera angles.
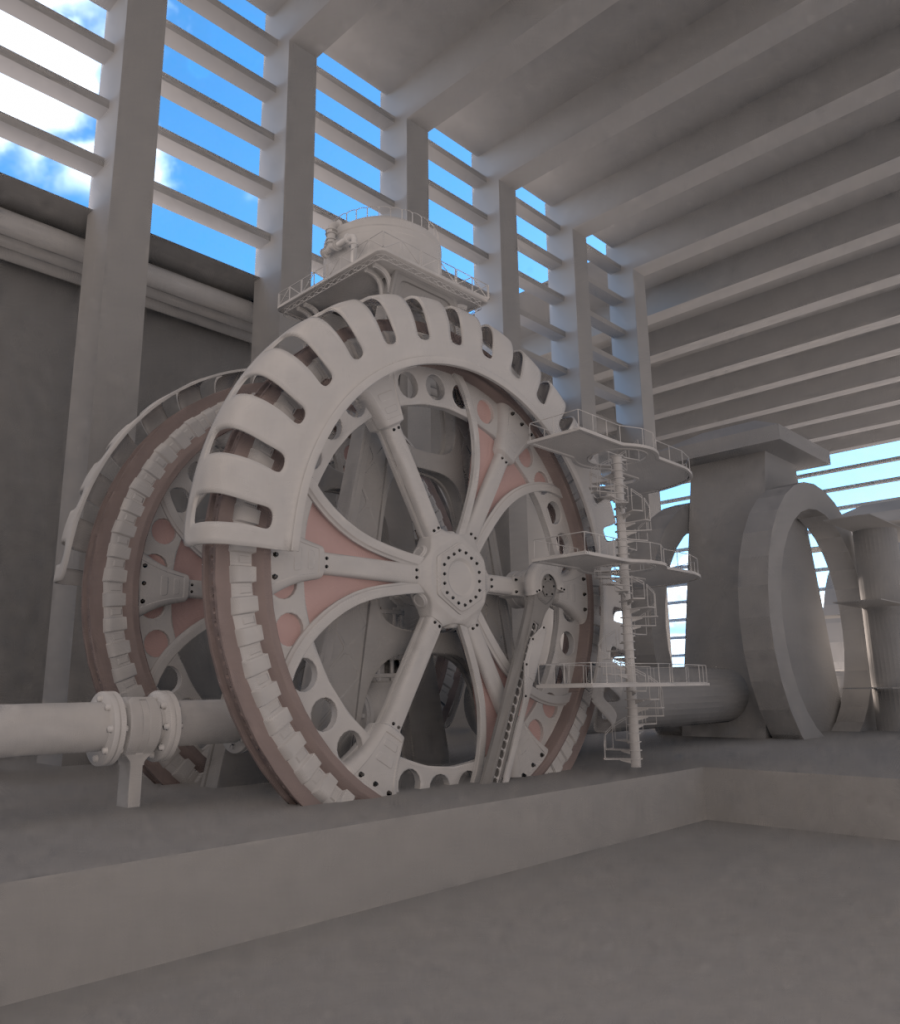
Starting to refine the focal point of the scene. Trying to avoid hard edges to make it more interesting.
The spokes on the wheel were spun around the center using the array modifier set to object offset. Railings and pipes were modeled using a curve with the fill set to full - then I added thickness with the depth slider under Geometry tab. This keeps the geometry light until it’s time for texturing.
I did some texturing in Substance Painter and a simple blockout of the surrounding hall to get a feel for the mood. Most objects have individual materials, so enabling the built-in node wrangler add-on is a huge timesaver. It lets you automatically apply maps to the principled shader.
The lighting was achieved with a HDRI and one sun lamp. Later i added some area lamps to illuminate darker spots. The volumetric light was achieved by putting a big box over the whole scene with a volumetric scatter shader applied to it - this gives the air juicy thickness. Gleb Alexandrov has an useful tutorial on this.
I also cut a big hole into the floor to add depth. Later I’ll add a railway that was used to bring coal to the burners.
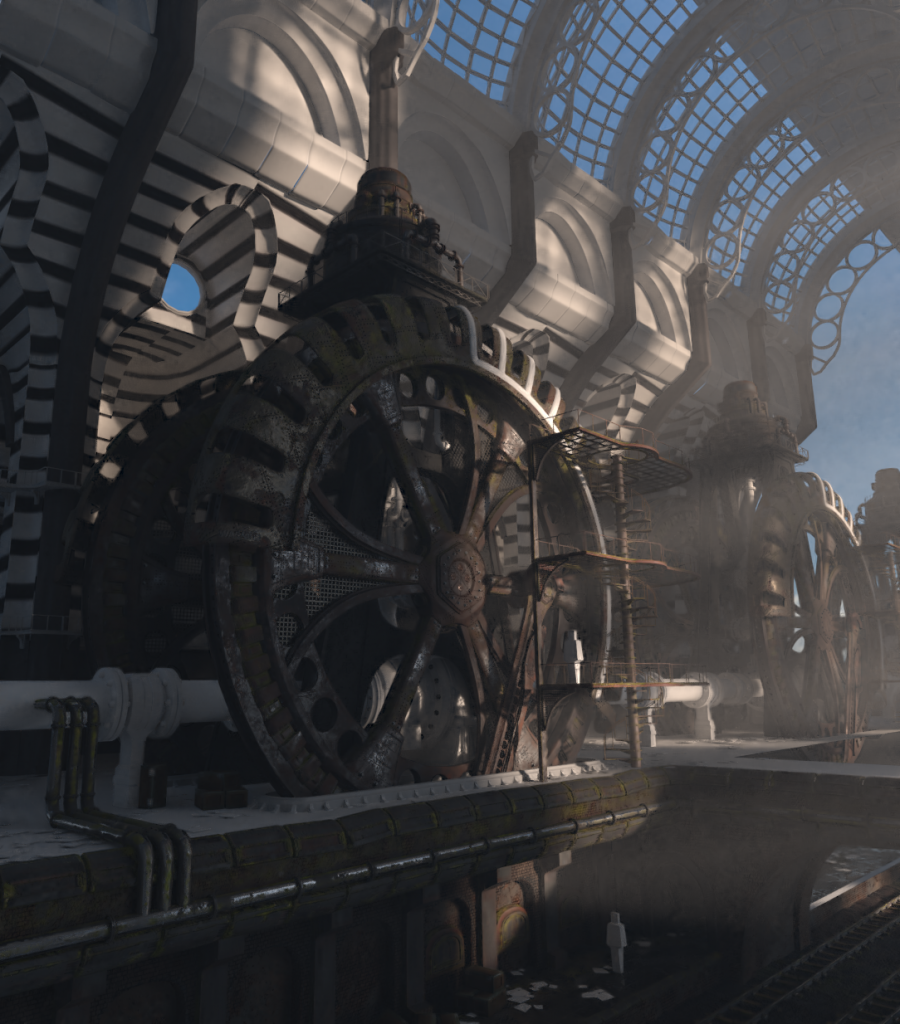
Refining the hall and adding more texturing. I tend to hop from modeling to texturing a lot to keep things fresh and keep me from burning out. The stripe texture on the back wall helped me to align the UV maps so the bricks wouldn’t be all wonky.
Further texturing and refining, beginning to introduce small details such as boxes, train cart, railings and pipes. I also grew some vines using Blender’s Ivy Generator and added some plants using Andew Price’s Grass Essentials (it’s a lifesaver!).
I also tweaked the camera angle and cranked down the focal length for dramatic effect.
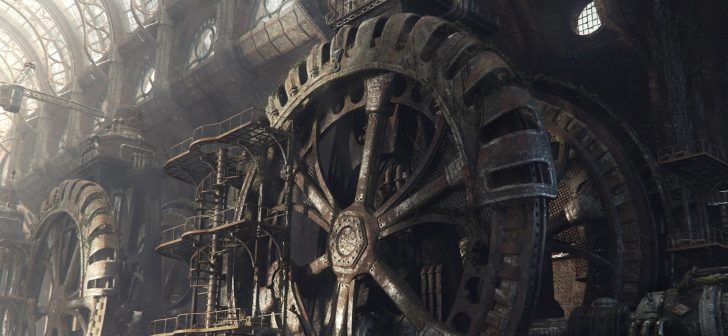
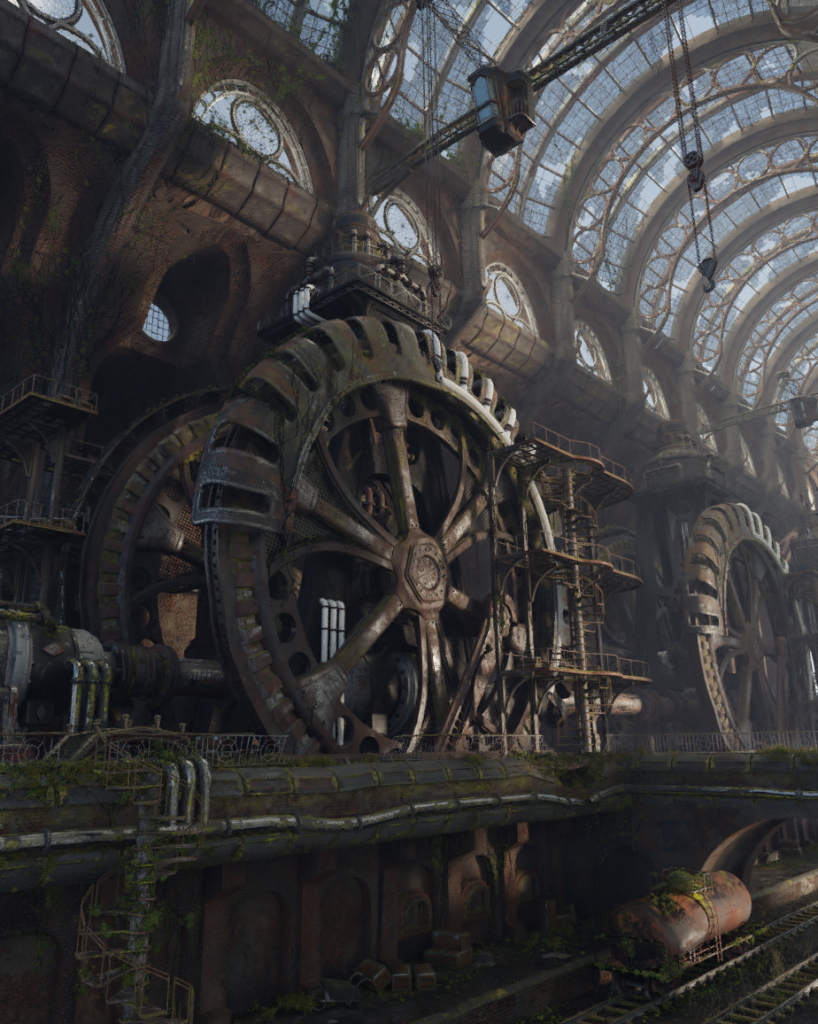
Boom, here’s the final raw render! I opted to render it with Cycles at a relatively small resolution and only 800 samples. Luckily Blender’s internal denoiser is quite effective. Still it ended up taking 42 hours, bless my poor computer. Time for what is probably my favorite part of any project – the post processing! I was very happy with how the render came out so I knew I wouldn’t have to perform too much magic in Photoshop.
Post processing
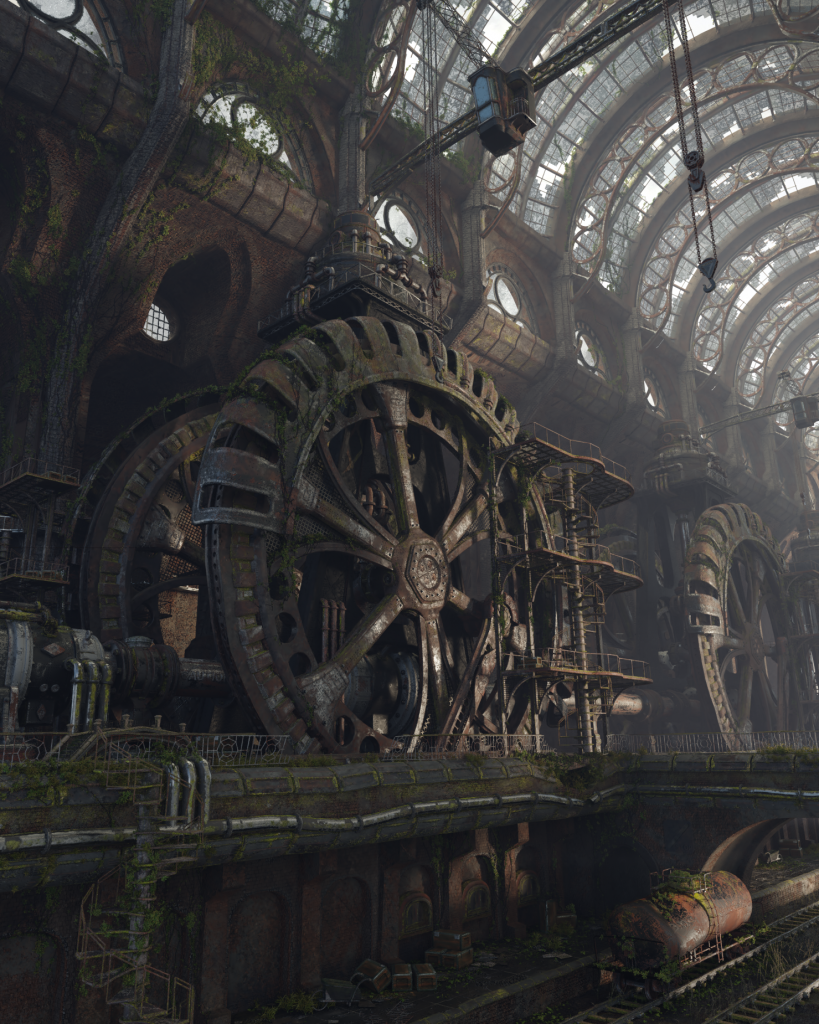
To start off, I flipped the image horizontally because I feel that most of my work tends to “flow” from left to right, so I wanted to do something different.
I began by painting over light sources (windows in this case) with a soft brush set on soft light blending mode. This sort of “mellowed” up the light and made the image more vibrant. I decided to keep the color palette quite dull and further de-saturated the green and yellow values. I added some very washed out light rays from the left using blocks of light yellow set to overlay blending mode. Overlay is probably the best thing ever. I also used it to paint some highlights on the wheel and walls. Small floating dust particles were added and I painted light washes over the distant areas to achieve greater aerial perspective.
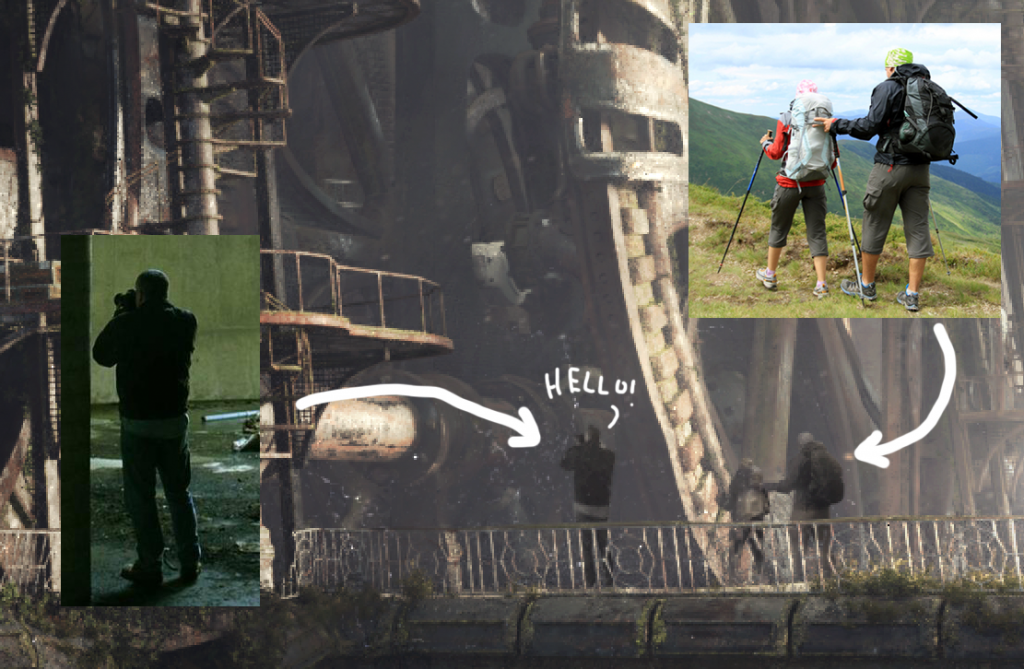
To further convey the scale of the place I photo-bashed small urban explorers I found from Google images.
Lastly I took the image to After Effects to make slight color adjustments and add a hint of chromatic aberration using Red Giant’s Magic Bullet Suite plugin.
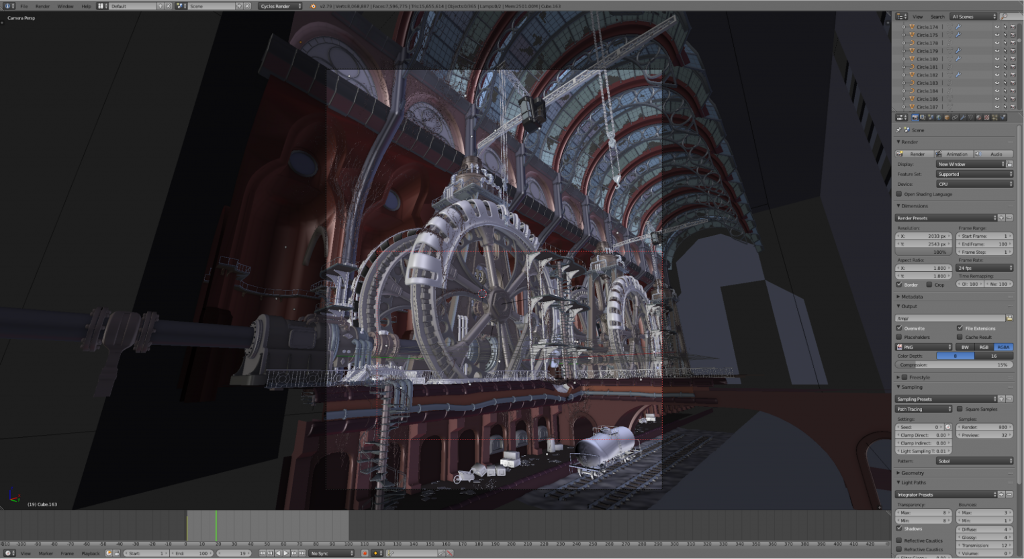
Oh, here’s a screencap of the viewport. It’s quite a mess with thousands of unnamed objects and an illegal amount of verts.
About the Author
 Toivo Huhtaniska, 3D generalist


8 Comments
Awesome work !
Epic! In my opinion the the most important thing in an image is capturing an atmosphere. This one has a great ”hugeness” and time seems to stop -ness to it. Also checked your portfolio, great works there! Where do you study? I studied 3d-visualization at Metropolia (05-09).
This is very well done! Wonderful! Hope to see more in the future.
Nice work! Has a really convincing aged, industrial look.
Wow, so awesome! Thanks for the breakdown!
This is everything I aspire as a 3D environment artist! Stunning, yes, but even better is the fact that you obviously devoted just as much TLC in putting together your documented workflow, not to mention it's very well-written and laid out in a very easy to follow manner. THAT, my friend, is worth more than anything and makes this pieces of art stand out IMO as easily the best piece of 3D art shared in a while. Just reading your workflow I feel like I leveled up 5 levels, it made that much sense. Post-processing is my weakness, and I've been begging the guys at Cookie to develop a full in-depth advanced course for VFX and post-processing just using Blender's compositor. I really can't say enough good or give enough thanks and kudos here so I'll digress...lol!
So cool!
Blender novice troll without the skills yet with deep appreciation for amazing art. Straight out of MYST and STEAMPUNK. Just WoW !!!! Will be looking for more of your work Sir.